Tuesday, August 21, 2012

{Travel Doggie Bowl Tutorial}


Have you ever traveled with your pup?
We did recently and my oh my...
Filling caps with water was not quenching Bentley's thirst quick enough while at a rest stop.
So I decided to make a travel bowl for food or water.


Materials needed:

Sewing Machine
1/4 yard of choice fabric for the outside. (Can be Duck Canvas or Cotton)*
1/4 yard of Nylon for inside (Make sure your nylon is not a loose weave)*
Matching Thread
Mark B Gone Pen
Scissors/Rotary Cutter
Pins 
Ruler
Iron

(*Please note: 1/4 yard will actually make two bowls if cut properly.)


1. Start by cutting out (2) two 8 1/2 x 6 1/4" pieces of the outside fabric and (2) two 8 1/2 x 7 1/4" of the inside fabric.


2. Line your two nylon pieces together and pin. Stitch three sides of the nylon with a 1/4" seam allowance and leaving an 8 1/2" side open. Next, do the same thing with the outside fabric but with the right sides together. Make sure to back stitch your beginning and end. 


3.  a) Now we are going to create the bottom. The unstitched end is now your top. Cut off the tip of the bottom corner close to the stitch shown in picture one. 
     b) The next part can be semi-tricky for someone who has never done it and I suggest you start with the outside fabric. You are going line up the inside right seam with the inside bottom seam and then it lay flat. Measure two inches from the point you have created, draw a line, and pin to keep in place. Repeat the same instruction to the left side. Once you have created your lines, follow and sew along your line.
     c) Cut off the point close to the line you have just sewn like you see in picture four.
    d) Repeat steps a-b for the inside nylon.


4. After completing step three, turn your outside fabric rightside out. Fold your raw open side in towards the middle of the bowl approx. 3/4" down and press. Now for the nylon it is a little different, make sure your iron is set on the nylon setting. If you don't have a setting for Nylon, it is usually the setting right above the lowest. Keep the nylon bowl inside out. Folding the nylon is completely backwards, you are going to fold the raw open edge OUT approx. 3/4" down, Press. Do this step with the nylon two more time, pressing each time. 


5. It is now time to see the bowl come to life. Place your nylon inside of the outer fabric, line up the seams and pin.


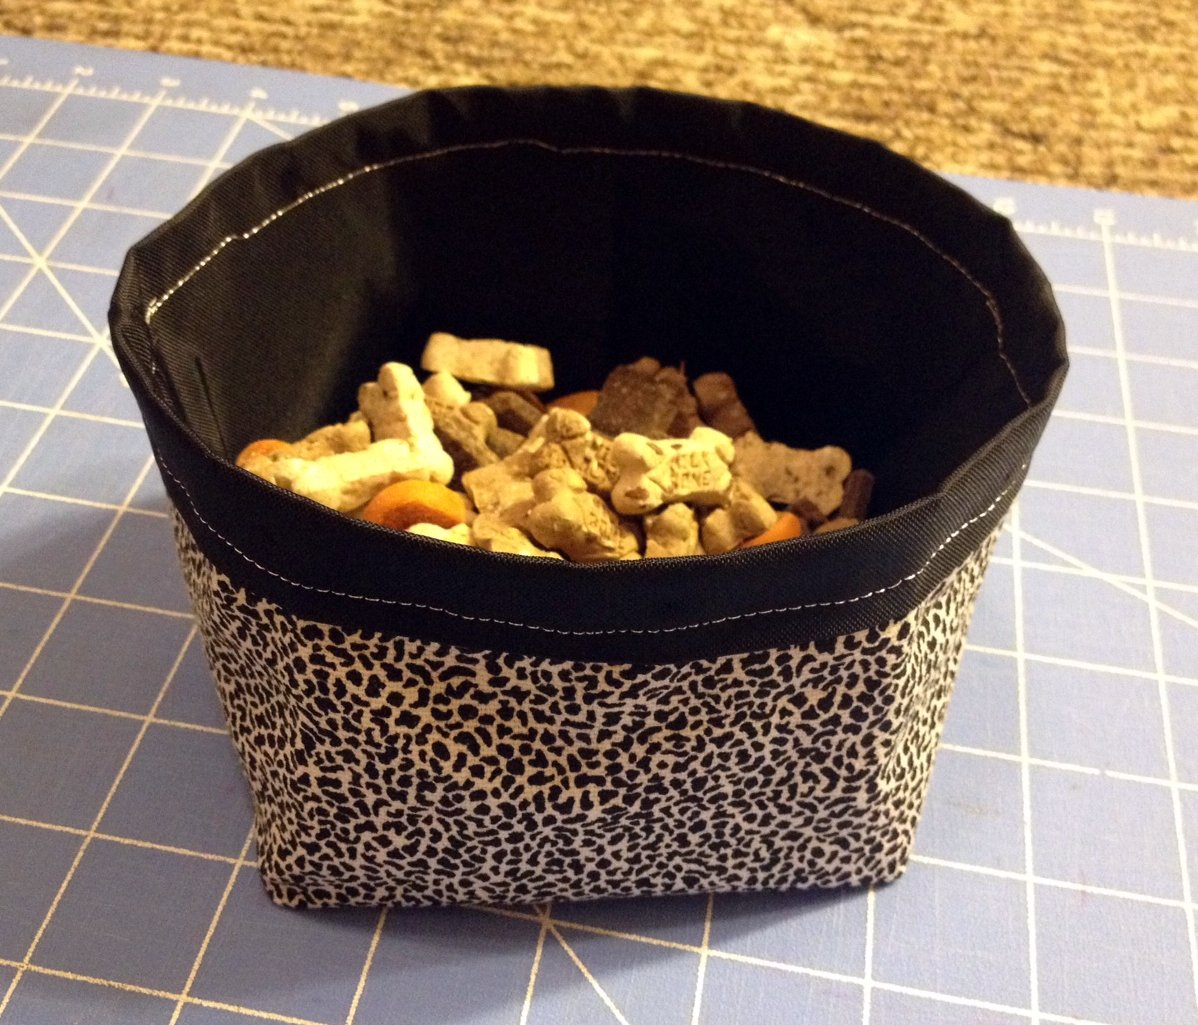
6. Sew your two pieces together towards the bottom of the black rim. And there you have it, now it is time to see if Bentley approves!  (For some reason my bowl is looking a little lop-sided in the picture with squiggly thread, but I promise in person it is not! :) )


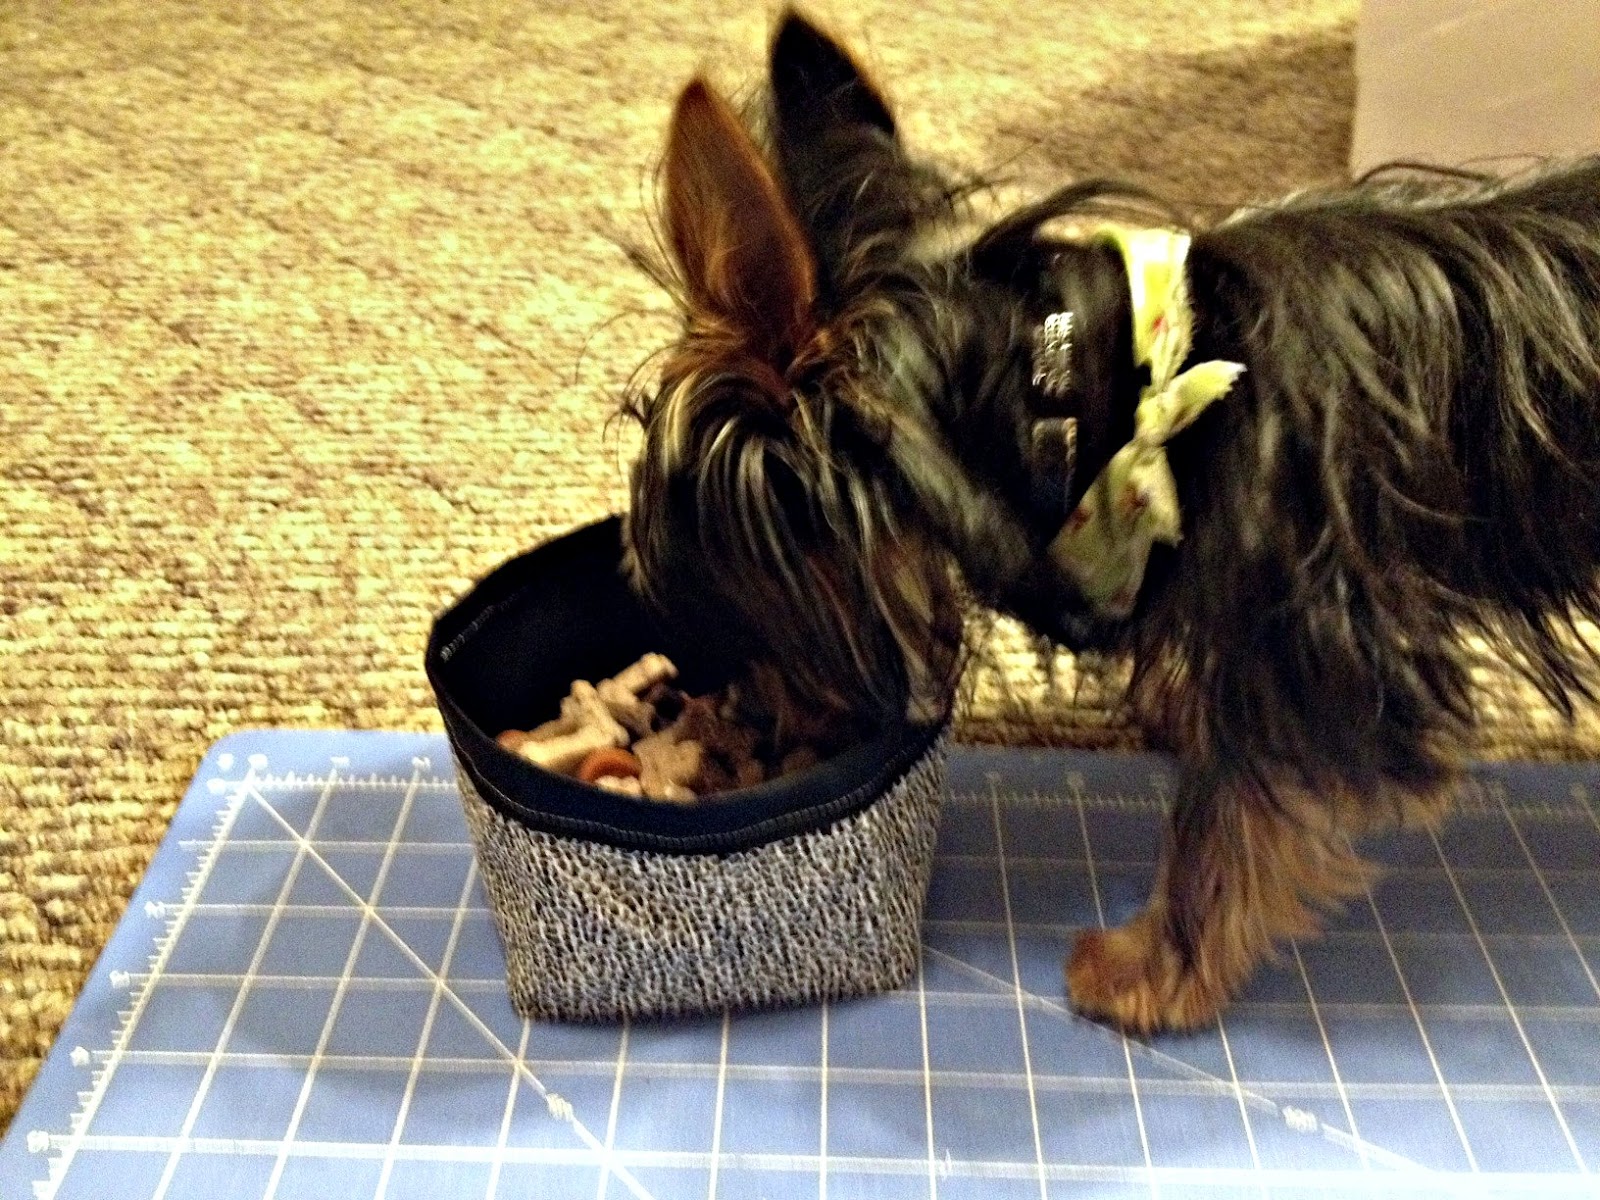
7. SCORE! He loves it! Ok, so maybe he just loves the treats inside of it but he doesn't seem to be bothered by the bowl itself! 

On to the next project..
I have a really neat one coming up for Christmas time, I can't wait to share!
The poor hamsters in my head never get a break, my wheels just keep on turning :).

Description


Sunday, August 19, 2012

{Burlap Wreath Tutorial}


Ahhhh, we meet again! :)

So today I am going to share my first ever tutorial with you on the wreath that I made recently. 
It is so easy and you will love the outcome!
Be resourceful and frugal and you can make this for $10 or less!


Materials you will need:

1 1/2 - 2 Yards of Burlap
100 Large Head Straight Pins
Styrofoam Floral Ring
Ruler
Scissors/Rotary Cutter


Optional materials:

Floral Embellishments
Spray Paint/Acyrlic Paint
Wooden Letters
Hot Glue Gun and Glue Sticks


Let's get started!


1.The picture above is approximately a 4x4" square to create the look of my wreath. Obviously depending on how you want you wreath to look you can cut the squares at any size you prefer. The bigger, the fluffier. The original color of the burlap may be used, or you can spray paint it any color you would like. 


2. There is actually a certain way I folded these to get the "fluff" shown. Start by folding your square in half and then bring the point to the right to the front of the bottom point at shown in picture two. Then, bring the left point to the back of the bottom point to complete the fold. Picture three shows what your finished fold should look like. You will then insert a straight pin through the burlap about an 1" or so from the bottom. Now you're ready to put it on the wreath.


3. Just keep pinning your folds of burlap randomly all over the Styrofoam ring. Don't worry about the strands that might start to fall off, once you have all the folds on it will hold the burlap from falling apart. Just trim any strands that are sticking out once you are finished.


4. Once I had all the burlap on, all I did was tear the flowers off the stems, added some berries and glitter twigs, some hand painted letters, and glued the all down with hot glue to stay put! And there you have it, a wreath for about a third of the price as the stores!! :)
I think a last name instead of welcome would be nice or maybe a large painted initial hung in the middle would be very pretty as well!

Enjoy!

Thursday, August 16, 2012

In the Beginning..


Bare with me as this is my very first blog!
................
Lets start with the boring basics.
................
My name is Kristin
My favorite color is purple and brown.
Why brown you ask?
It is my favorite color to decorate with.
I have a little yorkie that goes by Bentley
<------------See how cute he is!!!
I have an amazing boyfriend who completes me! 
Who loves to screw with perfect pictures. Haha
 (Hence my picture)
Antiquities/Vintage Jewelry Dealer
(^Click on  the link and it will take you to our currently listed items)
Military Relic Buff & Collector (mostly WWI&WWII)
Sewer/Quilter
&yada, yada, yada
................
Too much to list, I'll spare you the novel :)


Ok so now what to say?
I got it, lets start with this...

I LOVE TO CRAFT!

Simple enough, eh?
Crafting is a way of life for me as it may be for you as well. My mind races about different ideas ALL the time, sometimes I have to face reality and tell myself that there is not enough hours in a day to complete all that I would like to.
BUT.....
THERE IS ALWAYS TOMORROW! :)

I believe that having a hobby like mine can become VERY expensive if YOU LET IT!
I try to be smart with how I go about accumulating my supplies.
I pick up a lot of them at estate sales and hobby stores.
Sometimes a friend or family member might be throwing something out that they have no use for and that is when you chime in and claim your prize!
When you are shopping at a hobby store, check your local paper for coupons and sales.
If you have an iPhone or any smartphone, check the apps and see if your local supplies store has an app.
I can tell ya when I go to the one close to my house I usually walk out paying about a third of the original price!
Estate sales you really have to let your mind run free and think outside of the box to see the true potential beauty of some items.
For example:
At an auction I walked out with an older semi falling apart wooden box happy as a one can be which I paid less than ten dollars for.
James kind of looked at me like I was crazy for bringing this box into our house.
It wasn't until he seen what I did with the box that made him understand a little bit more of who I am.
I turned my little wooden box into a distressed box that held all of our blankets in the living room and one time I made it into a shelf on the wall.
So if we ever move and my wooden box doesn't fit in my living room it will work well with a piece of berry garland and some pictures on the wall!!
(I will upload a picture of this shortly)

My goal with this blog is to share some of my ideas.
If I upload a tutorial on something and you actually make a version of it please send me a picture to passionforcraftin@gmail.com.
I would LOVE to see your finished product!
Also, if you have something that maybe you would like to see a tutorial on please send your suggestions and requests to the same email
 passionforcraftin@gmail.com
As well as any other general questions.
Doing this will create a chain of ideas for all of us. 
Everyone has their own preferences and styles but sharing your creations might get someone out of a rut and spark their fire into creating something they love. 

 Enjoy!