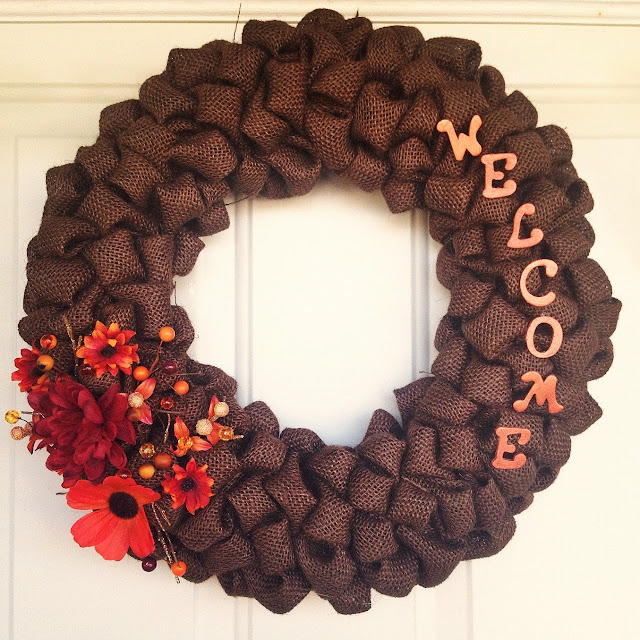
Ahhhh, we meet again! :)
So today I am going to share my first ever tutorial with you on the wreath that I made recently.
It is so easy and you will love the outcome!
Be resourceful and frugal and you can make this for $10 or less!
Be resourceful and frugal and you can make this for $10 or less!

Materials you will need:
1 1/2 - 2 Yards of Burlap
100 Large Head Straight Pins
Styrofoam Floral Ring
Ruler
Scissors/Rotary Cutter
Optional materials:
Floral Embellishments
Spray Paint/Acyrlic Paint
Wooden Letters
Hot Glue Gun and Glue Sticks
Let's get started!
1.The picture above is approximately a 4x4" square to create the look of my wreath. Obviously depending on how you want you wreath to look you can cut the squares at any size you prefer. The bigger, the fluffier. The original color of the burlap may be used, or you can spray paint it any color you would like.
2. There is actually a certain way I folded these to get the "fluff" shown. Start by folding your square in half and then bring the point to the right to the front of the bottom point at shown in picture two. Then, bring the left point to the back of the bottom point to complete the fold. Picture three shows what your finished fold should look like. You will then insert a straight pin through the burlap about an 1" or so from the bottom. Now you're ready to put it on the wreath.
3. Just keep pinning your folds of burlap randomly all over the Styrofoam ring. Don't worry about the strands that might start to fall off, once you have all the folds on it will hold the burlap from falling apart. Just trim any strands that are sticking out once you are finished.
4. Once I had all the burlap on, all I did was tear the flowers off the stems, added some berries and glitter twigs, some hand painted letters, and glued the all down with hot glue to stay put! And there you have it, a wreath for about a third of the price as the stores!! :)
I think a last name instead of welcome would be nice or maybe a large painted initial hung in the middle would be very pretty as well!
Enjoy!


So beautiful... can't wait to attempt!
ReplyDeleteThanks Ashley! If it would have been for me seeing your blog, I probably wouldn't have done this! :) Can't wait to upload more!
DeleteCan't wait to try it!!!! :)
ReplyDeleteI want one!!
ReplyDelete